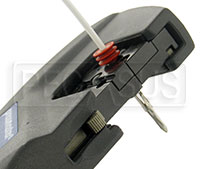
How to properly assemble and crimp the wire, terminal and dust seal.
 |
Step 1Strip wire 3/16" from the end and install the terminal seal over the insulation. The small OD of the seal should face the end of the wire. |
 |
Step 2Position terminal (you may squeeze the insulation crimp lightly with your fingers to maintain position while crimping). |
 |
Step 3Crimp the terminal (the Pressmaster tool is shown here). The Pressmaster tool crimps the wire and the dust seal/strain relief in a single operation. |
 |
Step 4Both the wire and insulation have perfect crimps! Just snap the terminal into the connector body and you're done. If you ever need to remove a terminal from a connector body, use the Weather Pack Terminal Extraction Tool. |


