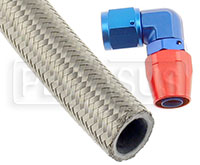
Using Bent Tube Style or Forged Red and Blue Anodized Hose Ends
These instructions apply to all of our rubber-lined, braided hoses including
Steel Braided Racing Hose (Part No. 3271),
Aramid Braided StartLite Hose (Part No. 3492),
and Fabric Braided StreetLite Hose (Part No. 3486)
Standard Steel Braided Fuel/Oil Hose & AN Hose Ends
StartLite Aramid Braided Fuel/Oil Hose & AN Hose Ends
StreetLite Fabric Braided Fuel/Oil Hose & AN Hose Ends
 |
Step 1Cut the hose squarely to length using a Cut-off Machine or a very fine tooth hacksaw. To minimize wire braid flare out, wrap hose with glass filament strapping tape. Do not remove tape until ready for step 2. |
 |
Step 2Remove tape and then quickly insert hose into the socket. Insert hose with a twisting, pushing motion until hose is in line with back of socket threads. Using our Koul Tools makes this step much easier. |
 |
Step 3Important: Mark position around hose at rear of socket with a grease pencil, paint or tape. |
 |
Step 4Lubricate inside of hose and nipple threads liberally using SAE 30 lubricating oil or Aeroquip Hose Assembly Lube. |
 |
Step 5Insert nipple and engage threads while holding hose in position with other hand. Make sure hose does not push out of socket by observing mark made in step 3. |
 |
Step 6Complete assembly using wrench while continuing to hold hose in position. Maximum allowable gap between socket hex and nipple hex is 0.031 inches. |
 |
Step 7Important: Check hose for push out by observing hose position mark. None should be evident. Clean, proof test to twice operating pressure and inspect all assemblies. |


